
Google Analytics 4 (GA4) is the standard tool for tracking website traffic, audience behavior, and SEO performance on any artist website. If you release music, sell merch, or book shows through your site, GA4 tells you exactly who visits, where they come from, and what they do before they leave. This guide covers the full artist website Google Analytics setup process, from creating your first property to linking Google Search Console for keyword data. You will not need a developer or a marketing degree to follow it.
What you need before setting up GA4 on your artist website
![]()
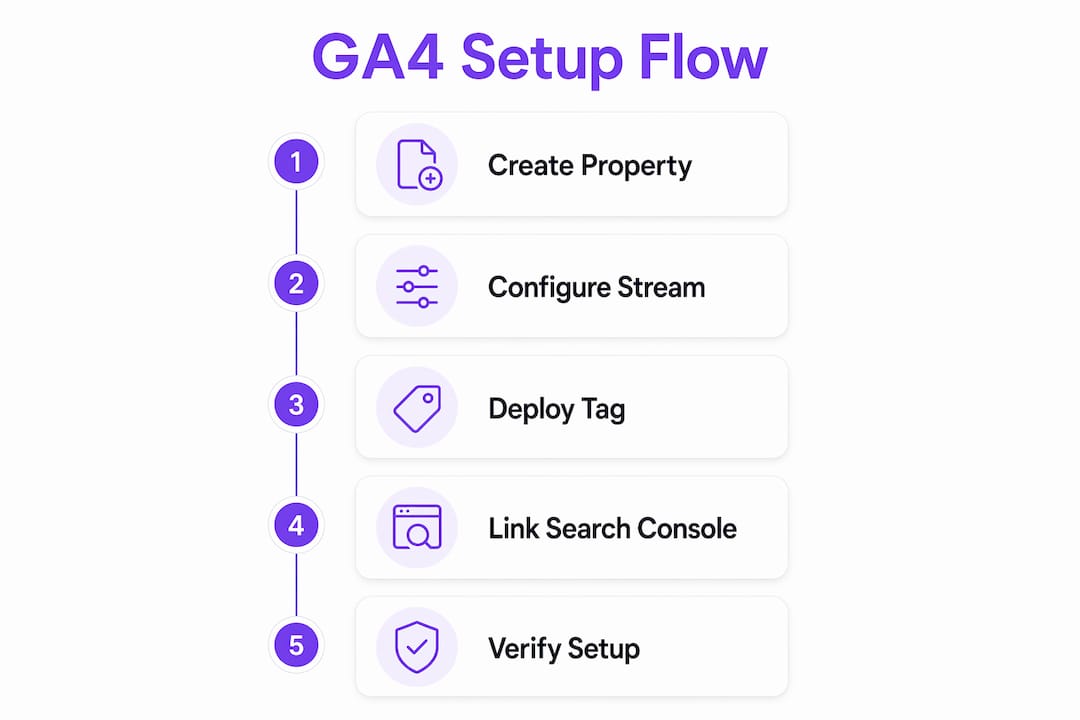
Before you touch a single setting inside Google Analytics, gather four things. Missing any one of them will stall your setup halfway through.
Here is what you need:
- A Google account with Analytics access. Go to analytics.google.com and sign in. If you manage your site under a label or management company, use the Google account tied to your professional email, not a personal Gmail you might lose access to later.
- Admin access to your website or CMS. Whether your site runs on Squarespace, WordPress, Wix, or a custom build, you need the ability to add code to the site header or install a plugin. Without this, you cannot deploy the tracking tag.
- A Google Tag Manager (GTM) container installed on your site. GTM is a free Google tool that lets you add and update tracking tags without touching your site's code every time. It is the recommended deployment method for GA4.
- Your domain verified in Google Search Console. Verification takes about five minutes and unlocks the ability to link Search Console to GA4 later, which is where keyword and impression data lives.
Pro Tip: Create a simple spreadsheet that logs your Measurement ID, GTM container ID, and Search Console property URL. Artists who manage multiple projects or websites will thank themselves for this habit within six months.
How to create a GA4 property and configure a web data stream
This is the core of your setup. Follow these steps in order and do not skip the data stream configuration, since that is where most artists make their first mistake.
- Open Google Analytics and click "Admin" in the bottom left corner. Under the Account column, select or create an account for your artist brand.
- Click "Create Property" in the Property column. Name it something specific, like "Jane Doe Music Website," and set your time zone and currency to match your primary market.
- Select "Web" as your platform when prompted to choose a data stream type. A web data stream is the collection boundary for your website, and the Measurement ID it generates is what connects your site to GA4.
- Enter your website URL and stream name. Use the exact URL your visitors land on, including the "www" or non-www version you use consistently.
- Enable Enhanced Measurement. GA4 automatically collects engagement signals including scroll tracking at roughly 90% page depth, outbound link clicks, file downloads, video engagement, and site search. For artists, scroll depth on a bio page and video plays on an EPK are immediately useful without writing a single line of custom code.
- Copy your Measurement ID. It looks like G-XXXXXXXXXX. Save it somewhere accessible because you will need it in the next section.
The table below shows which Enhanced Measurement events matter most for artist websites and what each one tells you.
| Event | What it tracks | Why it matters for artists |
|---|---|---|
| Scroll | Users who reach 90% of a page | Shows if fans read your full bio or tour page |
| Outbound click | Clicks to external links | Tracks Spotify, Apple Music, or merch store clicks |
| Video engagement | YouTube embeds on your site | Measures music video watch behavior |
| File download | PDF or audio file downloads | Tracks press kit or demo downloads |
| Site search | On-site search queries | Reveals what fans look for on your site |
How to install the GA4 tag using Google Tag Manager
Google Tag Manager is the recommended deployment method because it separates your tracking logic from your site's code. If you ever need to update your GA4 tag or add a new one, you do it inside GTM without touching your website files.
Follow these steps to deploy your GA4 tag through GTM:
- Sign in to tagmanager.google.com and open your container. If you do not have one, create a new container for your website and install the GTM snippet in your site's "<head>
and<body>` tags. - Click "Tags" in the left menu, then "New." Name your tag "GA4 Configuration" so it is easy to identify later.
- Select "Google Tag" as the tag type and paste your Measurement ID (G-XXXXXXXXXX) into the Tag ID field.
- Set the trigger to "All Pages." This tells GTM to fire the GA4 tag on every page load across your entire site.
- Click "Save," then click "Submit" to publish your container. Unpublished changes do nothing. Publishing is the step most first-time users forget.
- Validate using GTM Preview mode. Click "Preview" before publishing, enter your website URL, and GTM will show you exactly which tags fire on each page. If your GA4 Configuration tag appears under "Tags Fired," the deployment is working.
If GTM is not an option for your site, you can insert the GA4 tracking snippet directly into your website's <head> section. Copy the gtag.js code from your GA4 data stream settings and paste it as high in the <head> as possible. This method works but makes future updates more manual.
After deployment, open GA4 and check the Realtime report. It reflects active users within one to two minutes. If you see yourself listed as an active user after visiting your site, your tag is firing correctly.
Pro Tip: Use a separate browser profile or incognito window when testing so your own visits do not skew the Realtime data. Better yet, set up an internal traffic filter in GA4 Admin to exclude your IP address from all reports permanently.
How to link Google Search Console to GA4 for SEO insights
Linking Google Search Console to GA4 is one of the highest-value steps in this entire setup. Without this link, GA4 shows you traffic volume but hides the keyword data behind it. You will know fans visited your site from Google but not what they searched to find you.
Here is how to connect the two:
- Go to GA4 Admin and click "Search Console Links" under the Property column.
- Click "Link" and select your verified Search Console property. If your domain is not listed, go to Google Search Console first and complete domain verification.
- Choose the web data stream you created earlier and confirm the link.
- Wait 24 to 48 hours for the Search Console reports to appear inside GA4 under Reports > Search Console.
Once linked, GSC shows search queries and impressions while GA4 shows post-click behavior and conversions. Neither tool alone gives you the full picture. Together, they tell you which search terms bring fans to your site and what those fans do after they arrive.
Beyond the Search Console link, configure these additional settings to keep your data clean:
- Internal traffic filter: In GA4 Admin, go to Data Streams > Configure Tag Settings > Define Internal Traffic. Add your studio or home IP address so your own visits never appear in reports.
- Unwanted referral exclusions: If you use a third-party ticketing platform like Eventbrite or a merch platform like Bandcamp, add those domains to the referral exclusion list. Otherwise, GA4 counts every return visit from those platforms as a new session, inflating your traffic numbers.
- Cross-domain tracking: If you run a separate merch store on a different subdomain, configure cross-domain measurement so GA4 treats the full journey as one session instead of two.
How to verify your setup and avoid common mistakes
Verification is not optional. GA4 captures data immediately and cannot easily remove test traffic once it contaminates your reports. Validate before you go live.
Use these checks:
- DebugView: In GA4, go to Admin > DebugView. It shows event-level firing in real time, down to individual parameter values. This is the fastest way to confirm your setup is correct without waiting for standard reports.
- Realtime report: Open Reports > Realtime and visit your site. You should appear as an active user within two minutes.
- GTM Preview mode: Always preview before publishing any GTM container changes. It shows exactly which tags fire and which do not.
- Check for duplicate tags: If your site has both a GTM-deployed GA4 tag and a hardcoded gtag.js snippet, every event fires twice. Duplicate firing inflates all your metrics and corrupts your data. Remove one method entirely.
Standard GA4 reports can take 24 to 48 hours to stabilize after configuration changes, even when DebugView and Realtime show events immediately. Do not assume your tracking is broken if the main reports look empty on day one.
A common pitfall that trips up artists specifically: creating the GA4 property but never publishing the Search Console link. The link exists in settings but the reports never appear because the final confirmation step was skipped. Always click through to the confirmation screen and look for the green "Linked" status badge.
For artists with a staging site and a live production site, replicate your GA4 setup in both environments using separate data streams. This keeps test traffic completely separate from real fan data.
Key takeaways
A complete artist website Google Analytics setup requires a GA4 property, a configured web data stream, a deployed tracking tag, a Search Console link, and validated event firing before you trust any report.
| Point | Details |
|---|---|
| Create GA4 property first | Name it specifically and set the correct time zone before adding a data stream. |
| Enable Enhanced Measurement | Scroll, outbound clicks, and video events fire automatically with no extra code needed. |
| Deploy via Google Tag Manager | GTM makes future tag updates faster and keeps your site code clean. |
| Link Google Search Console | Without this link, GA4 shows traffic volume but hides the keywords driving it. |
| Validate before trusting data | Use DebugView and Realtime reports; standard reports lag by 24 to 48 hours. |
Why most artists set up GA4 and then ignore it
I have seen this pattern more times than I can count. An artist spends an afternoon getting GA4 running, checks the Realtime report once to confirm it works, and then never opens it again for six months. When they finally do, the data is there but they have no idea what to do with it.
The mistake is treating GA4 as a setup task rather than a feedback loop. The scroll depth data on your bio page tells you whether fans are actually reading it or bouncing after the first paragraph. The outbound click data tells you whether your Spotify link is getting traction or whether it is buried too far down the page. These are decisions you can act on this week, not someday.
My honest recommendation: start with three metrics only. Total users, top traffic sources, and outbound clicks to your streaming profiles. Check them once a week for 30 days. By the end of that month, you will naturally start asking better questions, and GA4 will have the answers waiting. Adding custom explorations for outbound link URLs is a natural next step once you are comfortable with the basics.
Do not let the depth of GA4 intimidate you into paralysis. The setup you completed today is already more than most independent artists have. Use it.
— Eric
Grow your artist website with Ampwave
Ampwave builds artist websites designed from the ground up to support analytics tracking and audience growth. Every site Ampwave creates is structured for clean GA4 integration, so your tracking tags fire correctly from day one without the debugging headaches that come with generic website builders. If you are ready to move beyond a basic web presence and start making data-driven decisions about your music career, explore what Ampwave offers for independent musicians who take their online presence seriously. The combination of a well-built site and properly configured analytics is what separates artists who grow their audience from those who guess at it.
FAQ
What is a GA4 Measurement ID?
A GA4 Measurement ID is the unique identifier for your web data stream, formatted as G-XXXXXXXXXX. You paste it into Google Tag Manager or your site's gtag.js snippet to connect your website to your GA4 property.
How long does GA4 take to show data after setup?
The Realtime report shows active users within one to two minutes of tag deployment. Standard reports take 24 to 48 hours to stabilize after configuration changes, so use DebugView for early validation.
Do I need Google Tag Manager to set up GA4?
GTM is strongly recommended but not required. You can paste the GA4 tracking snippet directly into your site's <head> tag, though GTM makes future updates significantly easier and reduces the risk of duplicate tag firing.
Why should artists link Google Search Console to GA4?
Linking Search Console gives you keyword-level data inside GA4 reports. Without it, you can see that fans arrived from Google search but not what they typed to find you, which limits your ability to optimize your site for organic discovery.
What Enhanced Measurement events matter most for artist websites?
Scroll tracking, outbound link clicks, and video engagement are the three most useful Enhanced Measurement events for artists. They show whether fans read your content, click through to streaming platforms, and watch your embedded music videos.